[Spring] 빈을 설정하는 3가지 방법 - XML, JAVA, Component Scan
새 프로젝트를 생성한다.
예제 코드에 필요한 의존성을 받기 위해 spring boot 프로젝트를 생성할 것이다.
참고로 예제 코드에는 이 의존성이 필요하다.


Spring Initializr를 선택하고 Next를 클릭한다.
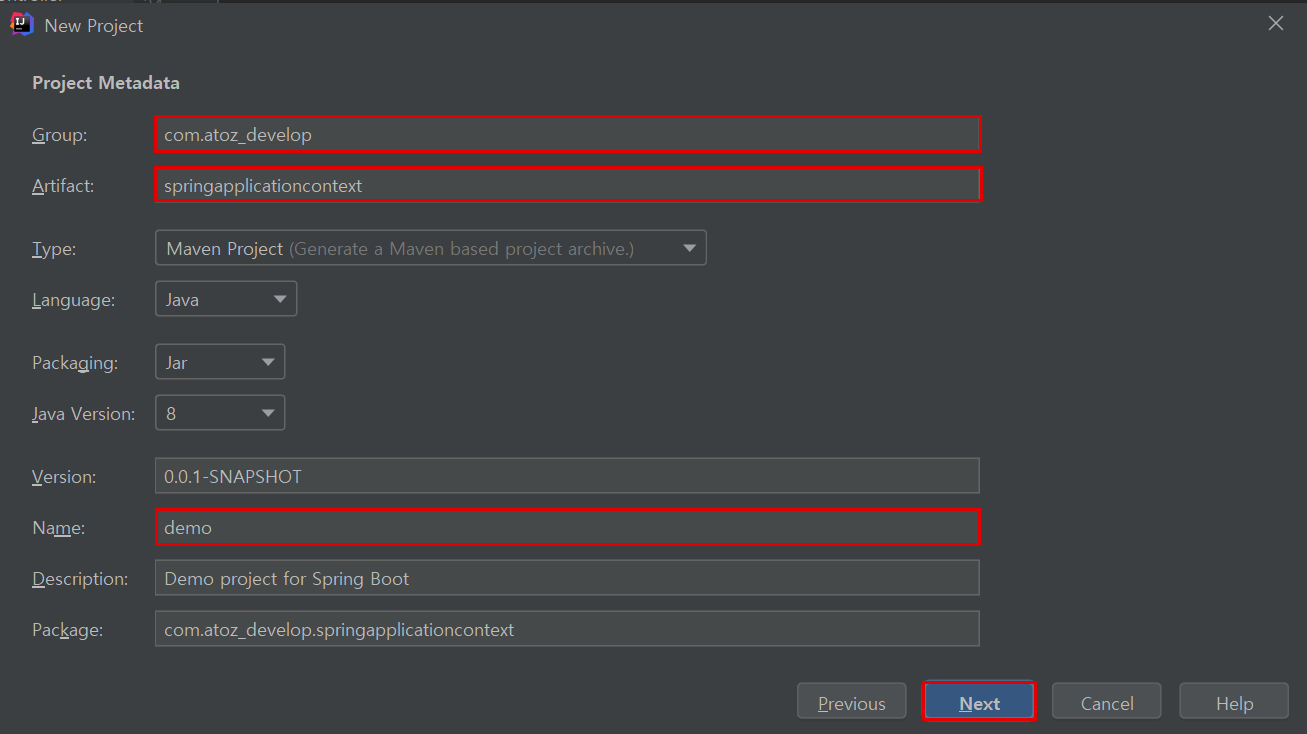
Group, Artifact, Name을 입력하고 Next를 클릭한다.
Group은 패키지명을 적어준다. (보통 도메인명을 뒤집어서..)

Web - Spring Web을 넣고 Next를 클릭한다.
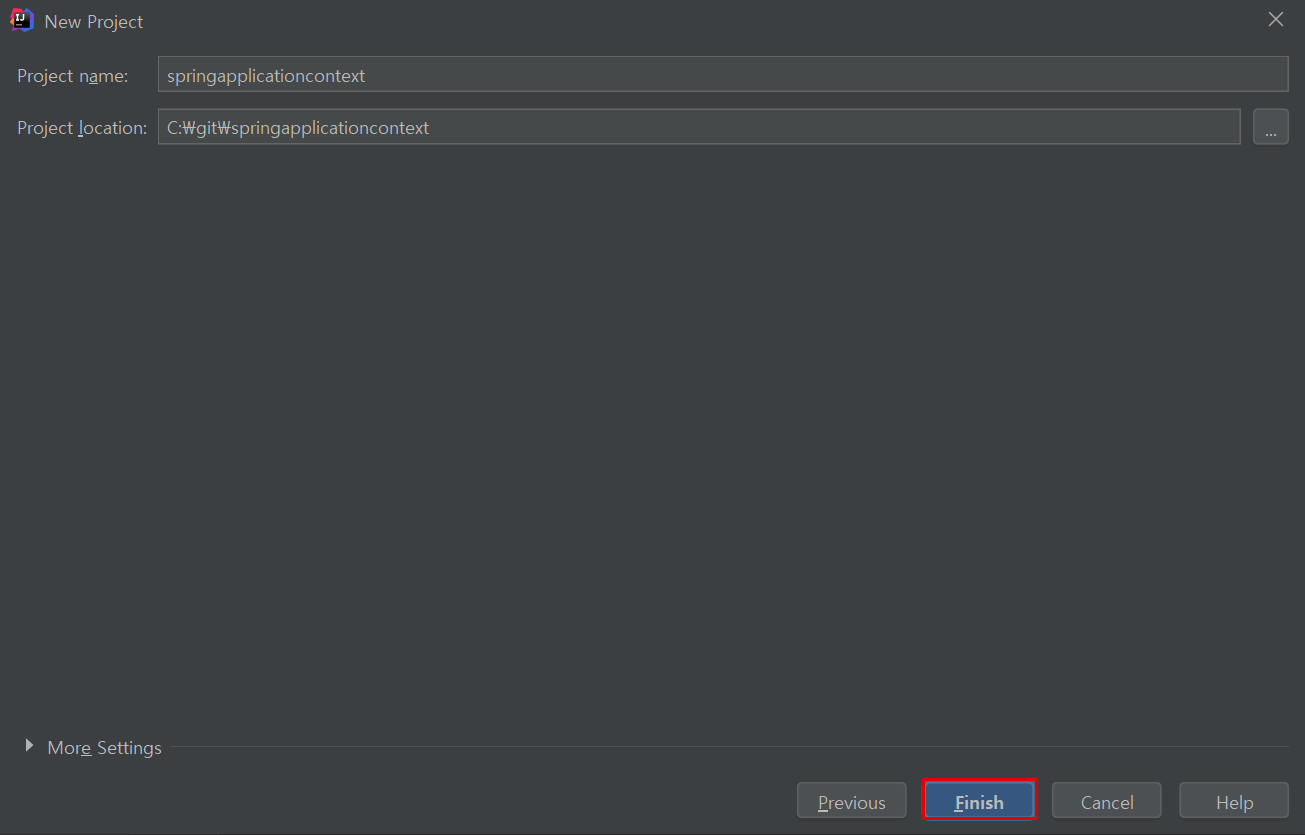
Finish를 클릭해서 신규 프로젝트 생성을 완료한다.

Spring boot 프로젝트를 만들었다.
pom.xml을 열어보면 spring boot 2.2.5 버전으로 만들어졌음을 확인할 수 있다.

우측의 Maven을 클릭하여 maven 뷰를 열어보면 spring 5.2.4 의존성이 들어온 것을 확인할 수 있다.
Spring boot 2.2에서는 spring 5.2 의존성이 들어오기 때문이다.

BookRepository, BookService 클래스를 생성한다.
BookService.java
|
1
2
3
4
5
6
7
8
|
public class BookService {
BookRepository bookRepository;
public void setBookRepository(BookRepository bookRepository) {
this.bookRepository = bookRepository;
}
}
|
cs |
BookService가 BookRepository를 사용한다고 가정한다.
이제 ApplicationContext로 두 클래스를 빈으로 등록해보자.
1. 고전적인 방법 - Spring Bean XML 설정 파일

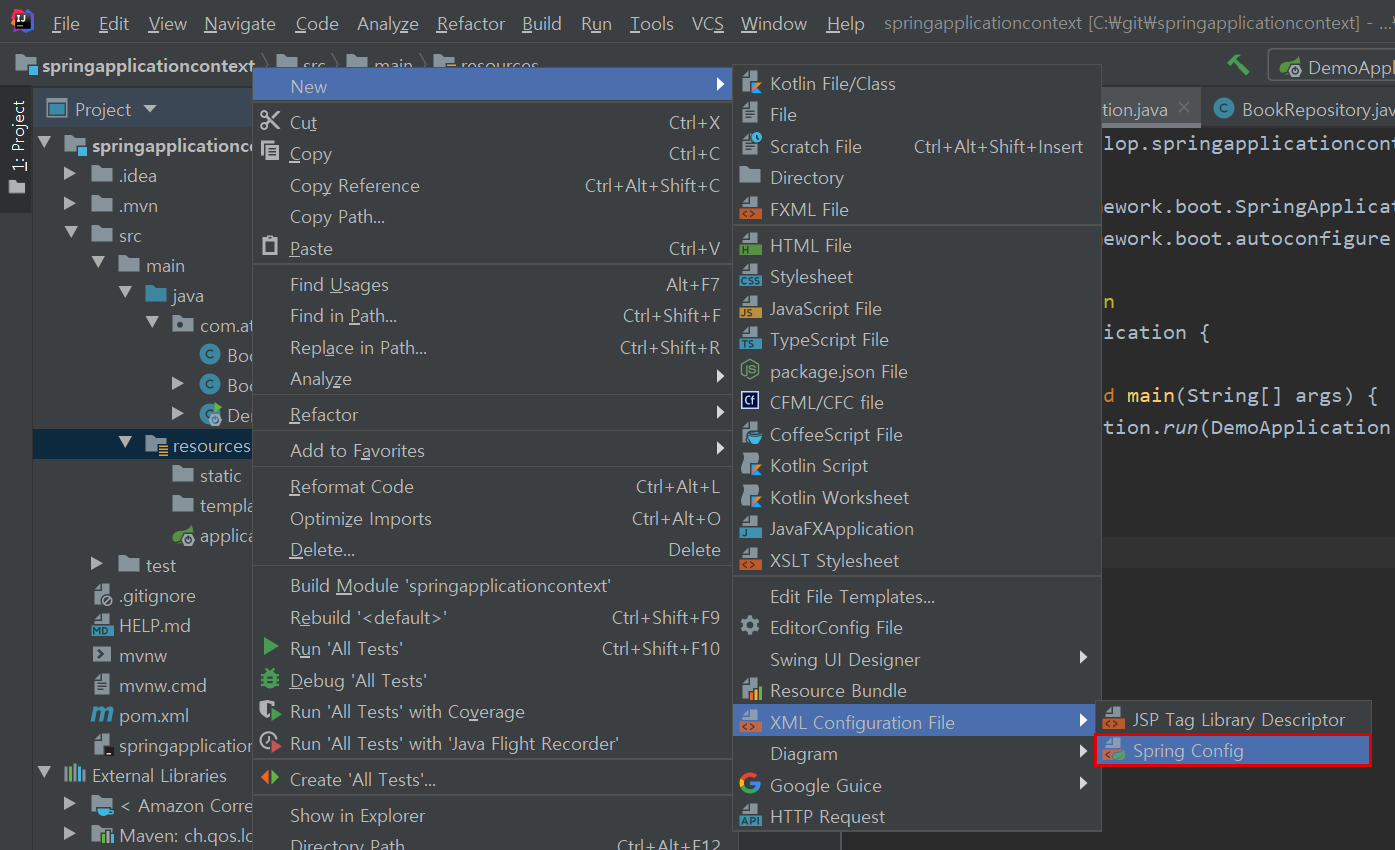
resources 폴더에 'application.xml' 이름으로 Spring Config XMl 파일을 새로 만든다.
application.xml
|
1
2
3
4
5
6
7
8
9
10
11
12
|
<?xml version="1.0" encoding="UTF-8"?>
xmlns:xsi="http://www.w3.org/2001/XMLSchema-instance"
xsi:schemaLocation="http://www.springframework.org/schema/beans http://www.springframework.org/schema/beans/spring-beans.xsd">
<bean id="bookService"
class="com.atoz_develop.springapplicationcontext.BookService"/>
<bean id="bookRepository"
class="com.atoz_develop.springapplicationcontext.BookRepository"/>
</beans>
|
cs |
<bean>에 빈을 등록해주면 된다.
id, class 속성은 필수 속성이다.
id에 빈의 id를, class에 빈으로 등록할 클래스의 QName(패키지명을 포함한 전체 이름)을 입력한다.
여기까지 설정한 내용은 BookService와 BookRepository를 빈으로 만들라는 것이다.
BookService가 BookRepository 빈을 주입받을 수 있도록 설정을 추가한다.
application.xml
|
1
2
3
4
5
6
7
8
9
10
11
12
13
14
|
<?xml version="1.0" encoding="UTF-8"?>
xmlns:xsi="http://www.w3.org/2001/XMLSchema-instance"
xsi:schemaLocation="http://www.springframework.org/schema/beans http://www.springframework.org/schema/beans/spring-beans.xsd">
<bean id="bookService"
class="com.atoz_develop.springapplicationcontext.BookService">
<property name="bookRepository" ref="bookRepository"/>
</bean>
<bean id="bookRepository"
class="com.atoz_develop.springapplicationcontext.BookRepository"/>
</beans>
|
cs |
빈 주입은 주입받을 빈의 <bean> 태그 하위에 <property> 태그를 이용해서 설정하면 된다.
<property>의 name 속성에 프로퍼티(setter) 이름을, ref 속성에는 주입할 빈의 id를 지정한다.
등록한 빈은 ApplicationContext를 통해 사용할 수 있다.
DemoApplication.java
|
1
2
3
4
5
6
7
8
9
10
11
12
13
14
15
|
import org.springframework.context.ApplicationContext;
import org.springframework.context.support.ClassPathXmlApplicationContext;
import java.util.Arrays;
public class DemoApplication {
public static void main(String[] args) {
ApplicationContext context = new ClassPathXmlApplicationContext("application.xml");
String[] beanDefinitionNames = context.getBeanDefinitionNames();
System.out.println(Arrays.toString(beanDefinitionNames));
}
}
|
cs |
ClassPathXmlApplicationContext()에 classpath의 xml파일을 넘겨 ApplicationContext를 생성한다.
ApplicationContext의 getBeanDefinitionNames()는 IoC 컨테이너에 등록된 빈의 id 목록을 가져온다.
실행 결과
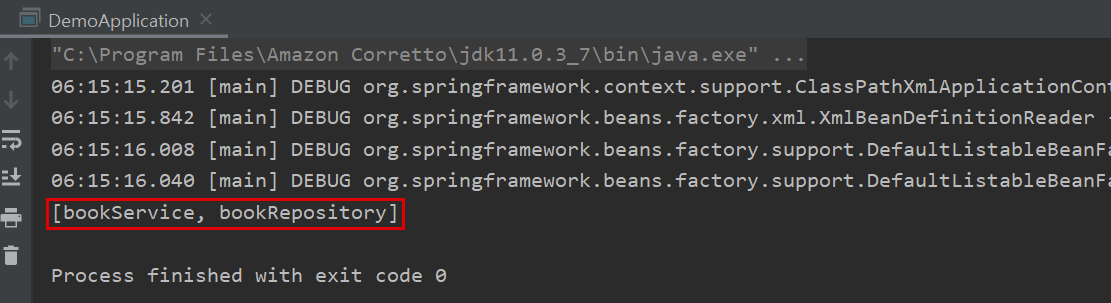
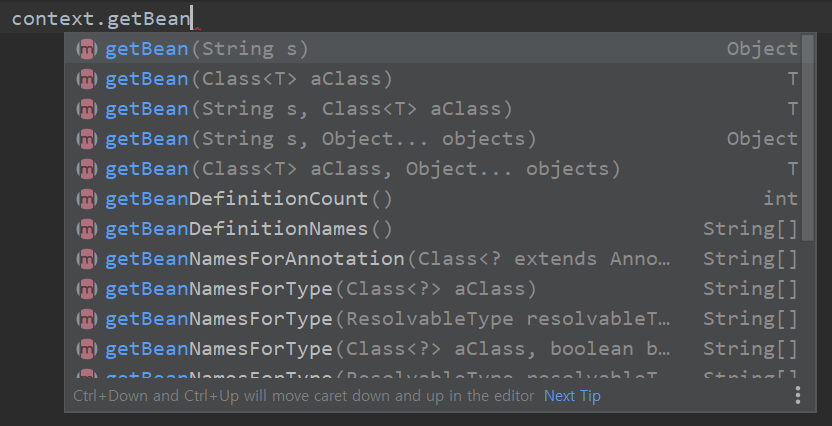
ApplicationContext의 getBean()으로 빈을 꺼낼 수 있다.
String 타입 파라미터에 빈의 id를 넘긴다. (bookService, bookRepository)
DemoApplication.java
|
1
2
3
4
5
6
7
8
9
10
11
12
13
14
15
16
17
|
import org.springframework.context.ApplicationContext;
import org.springframework.context.support.ClassPathXmlApplicationContext;
import java.util.Arrays;
public class DemoApplication {
public static void main(String[] args) {
ApplicationContext context = new ClassPathXmlApplicationContext("application.xml");
String[] beanDefinitionNames = context.getBeanDefinitionNames();
System.out.println(Arrays.toString(beanDefinitionNames));
BookService bookService = (BookService) context.getBean("bookService");
System.out.println(bookService.bookRepository != null);
}
}
|
cs |
ApplicationContext에서 bookService 빈을 꺼내 bookRepository가 null이 아닌지 확인해봄으로써 의존성 주입이 제대로 됐는지 알 수 있다.
실행 결과

아까 작성한 xml 설정 파일에 의해 BookService가 BookRepository 빈을 주입받은 것이다.
이 방법은 모든 빈을 <bean>으로 일일이 등록해줘야해서 굉장히 번거롭다.
그래서 다음으로 등장한 것이 component scan이다.
application.xml을 다음과 같이 변경한다.
application.xml
|
1
2
3
4
5
6
7
8
9
|
<?xml version="1.0" encoding="UTF-8"?>
xmlns:xsi="http://www.w3.org/2001/XMLSchema-instance"
xmlns:context="http://www.springframework.org/schema/context"
xsi:schemaLocation="http://www.springframework.org/schema/beans http://www.springframework.org/schema/beans/spring-beans.xsd http://www.springframework.org/schema/context https://www.springframework.org/schema/context/spring-context.xsd">
<context:component-scan base-package="com.atoz_develop.springapplicationcontext"/>
</beans>
|
cs |
위 설정은 base-package에 지정한 패키지에서부터 모든 하위 패키지를 scanning해서 빈을 등록하도록 한다.
당연히 모든 클래스를 빈으로 등록하는 건 아니고 @Component 애노테이션이 붙은 클래스를 빈으로 등록한다.
@Component를 확장한 몇가지 애노테이션이 더 있는데 그 중 @Service, @Repository가 있다.
그러한 @Component를 확장한 애노테이션을 사용해도 마찬가지로 빈으로 등록된다.
BookService.java
|
1
2
3
4
5
6
7
8
9
10
11
|
import org.springframework.stereotype.Service;
@Service
public class BookService {
BookRepository bookRepository;
public void setBookRepository(BookRepository bookRepository) {
this.bookRepository = bookRepository;
}
}
|
cs |
BookRepository.java
|
1
2
3
4
5
|
import org.springframework.stereotype.Repository;
@Repository
public class BookRepository {
}
|
cs |
이렇게 BookService와 BookRepository 클래스에 각각 @Service, @BookRepository 애노테이션을 붙여준다.
그러면 두 클래스가 빈으로 등록된다.
의존성 주입은 @Autowired 애노테이션을 사용한다.
BookService.java
|
1
2
3
4
5
6
7
8
9
10
11
12
13
|
import org.springframework.beans.factory.annotation.Autowired;
import org.springframework.stereotype.Service;
@Service
public class BookService {
@Autowired
BookRepository bookRepository;
public void setBookRepository(BookRepository bookRepository) {
this.bookRepository = bookRepository;
}
}
|
cs |
BookService.java의 BookRepository 변수에 @Autowired를 붙여주자.
이제 빈 등록과 의존성 주입을 위한 설정이 모두 완료되었다.
main()을 실행해보면 이전과 동일한 결과가 나온다.
application.xml에 일일이 설정하는 대신 애노테이션을 scanning해서 빈을 등록하고 의존성 주입하도록 변경한 것이다.
📝 애노테이션 기반의 빈 등록 및 설정은 spring 2.5부터 추가되었다.
2. JAVA 설정 파일의 사용
위에서 작성한 application.xml과 같은 XML 파일이 아닌 java로도 설정파일을 만들 수 있다.

ApplicationConfig 클래스를 새로 만든다.
ApplicationConfig.java
|
1
2
3
4
5
6
7
8
9
10
11
12
13
14
15
16
17
18
|
import org.springframework.context.annotation.Bean;
import org.springframework.context.annotation.Configuration;
@Configuration
public class ApplicationConfig {
@Bean
public BookRepository bookRepository() {
return new BookRepository();
}
@Bean
public BookService bookService() {
BookService bookService = new BookService();
bookService.setBookRepository(bookRepository());
return bookService;
}
}
|
cs |
Java 설정 파일을 만들려면 @Configuration을 붙여주고 빈으로 등록할 객체를 리턴하는 메소드를 정의한다.
메소드명이 빈 id, 리턴 타입이 빈 타입, 리턴한 객체가 빈 레퍼런스가 된다.
의존성은 직접 setter를 호출해서 주입해준다.
DemoApplication.java
|
1
2
3
4
5
6
7
8
9
10
11
12
13
14
15
16
17
18
|
import org.springframework.context.ApplicationContext;
import org.springframework.context.annotation.AnnotationConfigApplicationContext;
import java.util.Arrays;
public class DemoApplication {
public static void main(String[] args) {
// ApplicationContext context = new ClassPathXmlApplicationContext("application.xml");
ApplicationContext context = new AnnotationConfigApplicationContext(ApplicationConfig.class);
String[] beanDefinitionNames = context.getBeanDefinitionNames();
System.out.println(Arrays.toString(beanDefinitionNames));
BookService bookService = (BookService) context.getBean("bookService");
System.out.println(bookService.bookRepository != null);
}
}
|
cs |
Java로 만든 설정 파일은 AnnotationConfigApplicationContext()에 class를 넘겨서 사용할 수 있다.
📝 AnnotationConfigApplicationContext란?
애노테이션 기반의 빈 config를 사용하는 ApplicationContext 구현체이다.
기존에 붙어있던 @Service, @Repository, @Autowired를 삭제하고 실행해보자.
역시 실행 결과는 동일하다.
Java 설정 파일에서 직접 setter를 호출하지 않고 @Autowired를 붙여서 의존성을 주입해주는 것도 가능하다.
ApplicationConfig.java
|
1
2
3
4
5
6
7
8
9
10
11
12
13
14
15
16
|
import org.springframework.context.annotation.Bean;
import org.springframework.context.annotation.Configuration;
@Configuration
public class ApplicationConfig {
@Bean
public BookRepository bookRepository() {
return new BookRepository();
}
@Bean
public BookService bookService() {
return new BookService();
}
}
|
cs |
BookService.java
|
1
2
3
4
5
6
7
8
9
10
11
|
import org.springframework.beans.factory.annotation.Autowired;
public class BookService {
@Autowired
BookRepository bookRepository;
public void setBookRepository(BookRepository bookRepository) {
this.bookRepository = bookRepository;
}
}
|
cs |
Java 설정 파일에서 직접 setter를 호출해서 의존 관계를 엮어주지 않아도 @Autowired 애노테이션을 붙여주면 의존성 주입이 된다.
3. JAVA 설정 파일 + Component Scan
위 방법은 XML 설정 파일에서 component scan을 사용하도록 설정하는 것보다 더 번거롭다.
그래서 Java 설정파일에서도 component scan을 사용할 수 있다.
ApplicationConfig.java
|
1
2
3
4
5
6
7
8
|
import org.springframework.context.annotation.ComponentScan;
import org.springframework.context.annotation.Configuration;
@Configuration
//@ComponentScan(basePackages = "com.atoz_develop.springapplicationcontext")
@ComponentScan(basePackageClasses = ApplicationConfig.class) // 더 type safe한 방법
public class ApplicationConfig {
}
|
cs |
Java 설정 파일 클래스에 @ComponentScan 애노테이션을 붙인다.
Scan을 시작하는 패키지를 지정하는 방법으로 basePackages와 basePackagesClasses의 두 가지 속성을 사용할 수 있는데 basePackages에는 패키지 이름을 문자열로, basePackagesClasses에는 scan을 시작할 위치의 클래스를 지정한다.
basePackagesClasses가 더 type safe한 방법이다.
다시 BookService와 BookRepository에 @Service, @Repository 애노테이션을 붙여준다.
이렇게 설정해주면 XML 설정 파일에서 <context:component-scan...>을 설정한 것과 동일하게 동작한다.
이렇게 java 설정 파일에 @ComponentScan 애노테이션을 붙여서 설정하는 것이 spring boot 기반에서 사용하는 방법과 가장 가까운 방법이다.
역시 실행 결과는 동일하다.
📝 지금까지 ApplicationContext를 직접 만들었는데 spring은 ApplicationContext를 알아서 만들어준다.
또한 java 설정 파일로 만들었던 ApplicationConfig.java 같은 파일도 spring boot를 사용하면 따로 생성할 필요가 없다.
'Programming > Spring' 카테고리의 다른 글
| [Spring] @Autowired 동작 원리 - BeanPostProcessor (0) | 2022.05.29 |
|---|---|
| [Spring] @Autowired의 다양한 사용 방법 - required, Primary, Qualifier (0) | 2022.05.29 |
| [Spring] 스프링 PSA (0) | 2022.05.29 |
| [Spring] 스프링 빈(Bean)의 개념과 생성 원리 (0) | 2022.05.29 |
| [Spring] 의존성 주입(DI, Dependency Injection)의 세가지 방법 (0) | 2022.05.29 |